Tried making soda farls from scratch at home
Not sure if I got them quite right.
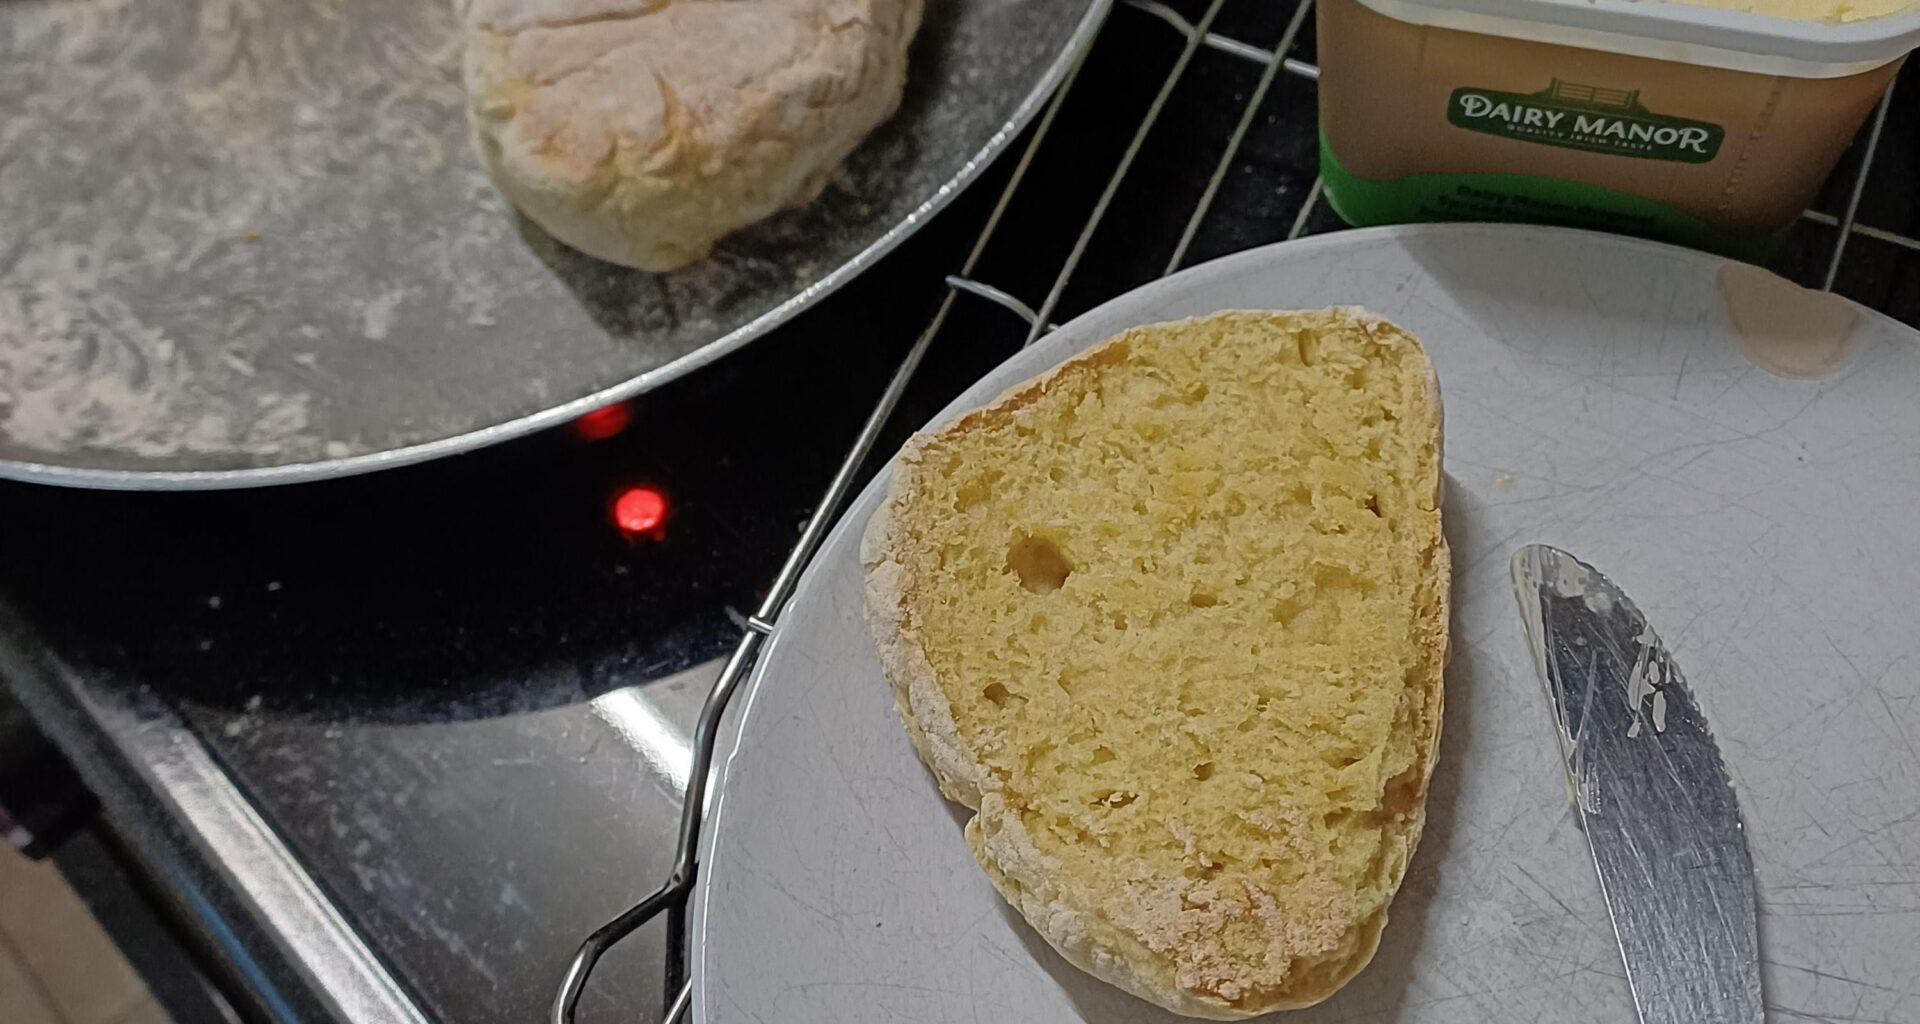
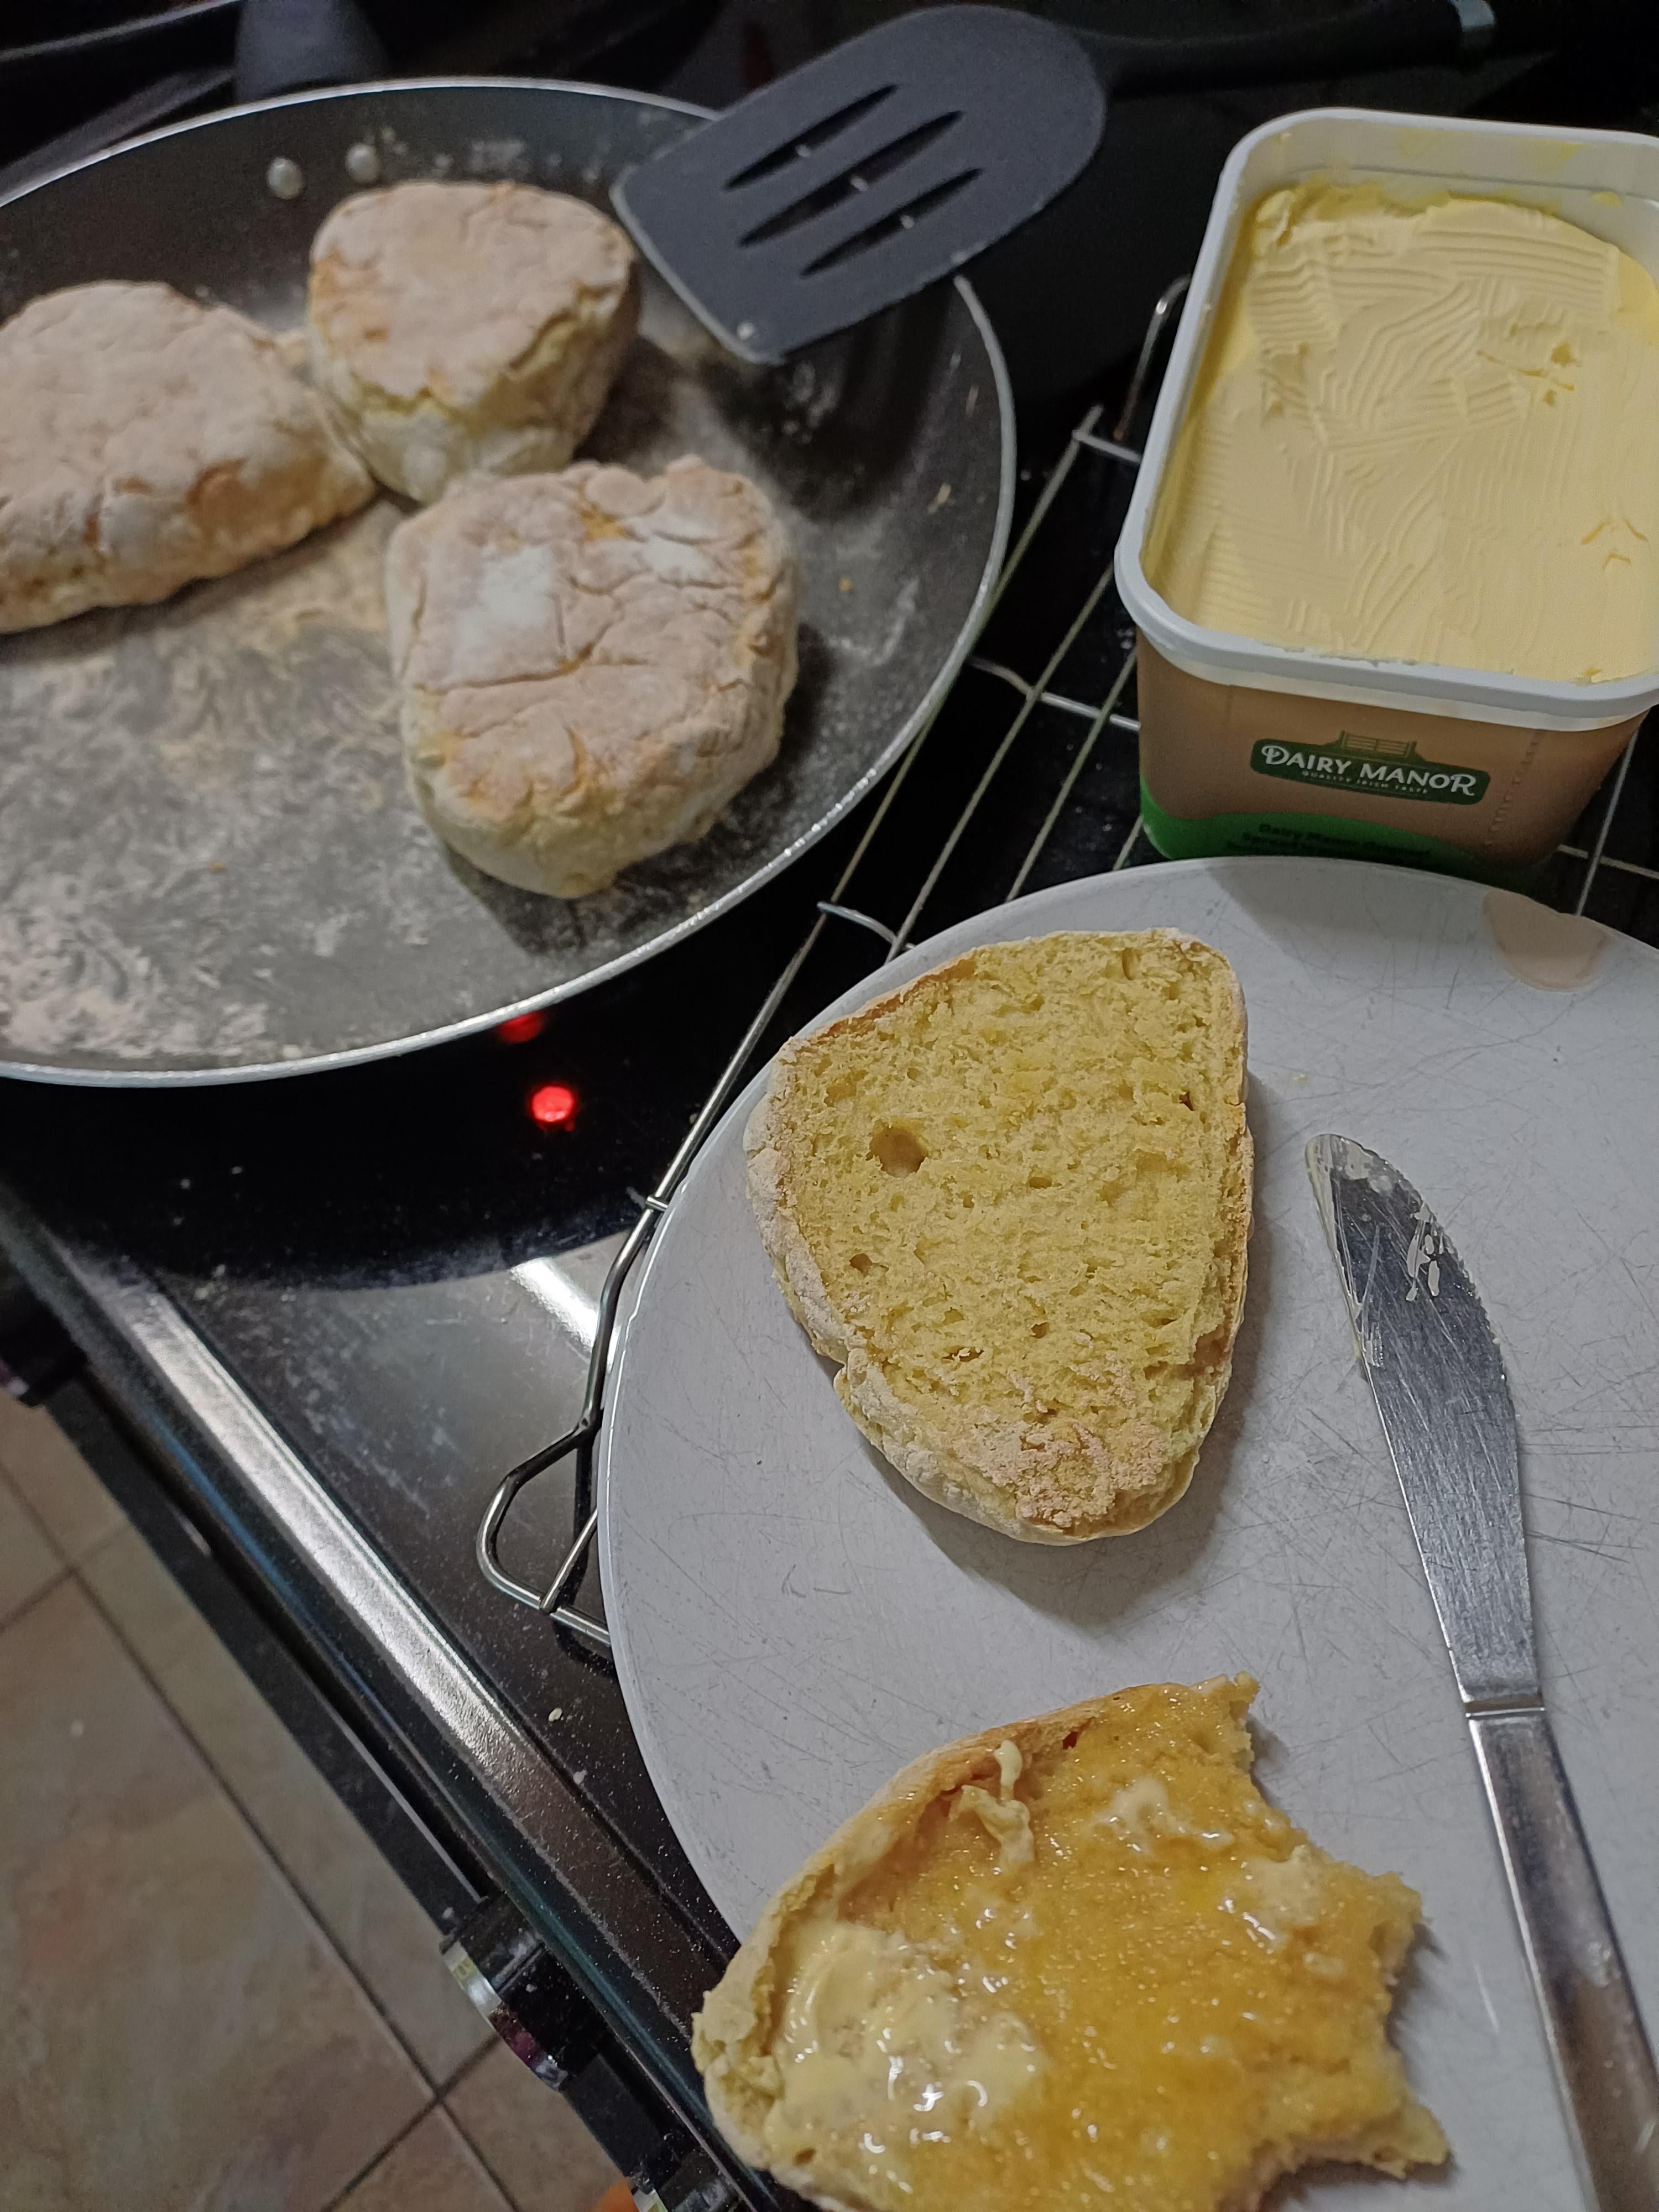
They have a almost chewy consistency and a slight yellow colour that I think is due to the baking soda (but I followed the recipe exactly on how much to put in)
When i was making the dough, I wasn't sure how much buttermilk was too much as the video followed didnt show it very well, but the dough was very sticky and getting stuck all over my fingers.
I used nearly all the buttermilk prescribed.
The taste is also not quite I'm used to from the shop.
What am i doing wrong?
Here is a link to the recipe I followed:
https://youtu.be/zCEu-F_o4WY?si=XvqMxNDWFLThGaw8
by IrishNinja1903
31 comments
They look good to me
Side point, the farl that’s cut open, I cut open and continued to fry the open ends so it might looked more cooked than it was.
They look gorgeous tbh!
Apparently if you crack an egg into it when mixing it’s much fluffier.
My biggest tip would be for you to give them to me thanks
I’m sure my impression of them would greatly improve by stuffing one in my gub right now.
Practice. Farls are like scones, in that you don’t really want to handle them too much or you overwork it and they end up a little chewey like you describe.
The good news is that they’re probably still delicious so getting better at this is going to involve lots and lots more delicious farls. You’ll get a feel for it.
Good luck! I had to stop making them because it was costing us a fortune in butter.
Upgrade the butter and they’ll be 100% better
Consider a thicker/heavier skillet? Rather than a thin non stick frying pan. Better heat distribution and retention should allow you to cook them more gradually and evenly (though they look good anyway)
It’ll have applications beyond soda bread too!
Swear my tired brain read that as “soda farts” 🤦♀️
This is my family recipe: -2 cups soda bread flour ( if you can’t get soda bread flour then use self-raising and add 1 tsp of bicarbonate soda)
-1cup buttermilk (if you can’t get buttermilk you can use normal milk and add a splash of lemon juice). Polish buttermilk is the best to use – it’s more like the old fashioned buttermilk we used to have.
-pinch of salt
– Combine ingredients, mix and knead with hands. Doesn’t need too much kneading, the dough is generally quite wet.
– patt the dough out with your hands using a as little pressure as possible and cut into 4. Cook on a heavy bottomed pan on a low heat for around 10mins each side.
– when it sounds hollow when knocked it’s ready
I noticed that your farls are quite thick – when patting out the dough make it almost as wide as the frying pan it’s going into – this lets the farls puff up more vertically as there’s not as much weight to lift. Also don’t turn more than once. If they’re getting too dark but not sounding hollow put the pan into the oven on a low heat to finish off.
Maybe ask in a comment below the cookery school’s video on YouTube?
1 cup buttermilk
2 cups plain flour
1 teaspoon salt
2 teaspoons bicarb
Get a heavy bottomed pan on a medium heat.
Mix the dry, pour in the wet, work til you’ve got a dough, be prepared to add more flour.
Turn out onto well floured surface. Bring together into a ball.
Roll it to a inch thick circled and cut into quarters.
Into the pan, turn every few mins until it’s hollow sounding when tapped.
They look great OP!! 🍽️🫶🏻
These look delicious.
I’ve seen a few posts here in the past and people sharing recipes you try. If you don’t wish to change recipe maybe you could watch a few more videos and pick up a few tips from people explaining things better.
Honestly wouldn’t say no to those, toasted with half a ton of butter……
I always use a cast iron pan. Haven’t done any in a while but it always took ages to cook them.
I never used butter milk. I just added some lemon juice to milk.
If they are doughy when you cut into them. Just toast them and add loads of butter.
Bacon and cheese.
Thank me later.
A bit thick
Don’t knead them so much. They look a bit tight. Cook them at a lower heat for a little longer, and yes, let them cool. You can wrap them in a damp cloth to stop them drying out too much.
Source – I’m a baker.
Edit: I’ve also seen people use flour and rub the stuff from your hands into the mix – don’t do that. When you rub your hands together you’re basically “super-kneading” tiny bits of dough. They won’t cook and they’ll just turn hard or leave little dough blobs in your nice even farl
Wheres the real butter instead of that plastic stuff? They look tasty though..i throw a lid over mine for a bit while cooking and i only do that because my granny used to do it.. What temperature is ur pan? Yours sound under cooked..
Butter
Dump the marg.
350 plain flour
1 LEVEL TEASPOON soda (no more, it’ll change the taste and make it a weird colour)
Butter milk, start with about 200ml bring together with a knife, dribble more buttermilk till it pulls away from the sides and forms a dough. The dough should by dry not sticky.
Turn out on to a floured surface and pat into a round of about an inch (thickness of your first thumb knuckle) do NOT work the dough. Cut into farls.
Cook in a dry pan over a medium high heat for six minutes on each side then two minutes on each edge. Take the pan off the heat, cover with a clean tea towel and leave till you’re ready to use them.
Her recipe looks bang on, I will point out the importance of “underkneading” you don’t want to overwork the bread. I mix mine til it’s just about combined and no more.
If you found it a bit yellow that’s probably a little too much baking soda. I normally use soda flour, but if that’s not available, either a little more plain for or less baking soda
These look great! Toasted and plenty of butter for me please.
Gotta use real butter as well. Not plastic spread
Gotta use real butter, that spread is a crime against breakfast.
90% hydration is what I’ve always seen recommended so it is an intentionally sticky dough, though I often add more dough after kneading to handle it in the pan.
If you let them cool/cook completely and then reheat you’ll get the dry store bought texture in my experience.
I can tell the issue, you’re not making enough dough.
Make more next time, and send me half a dozen 🙂
They look awesome
Use real butter would be my advice.
Comments are closed.