Chrissy Glentis believes everyone deserves to enjoy delicious meals without the stress of complex recipes or hard-to-find ingredients.
That is especially true for people following a low-FODMAP diet and she aims to make that journey not only manageable but enjoyable.
“It’s hard to eat out, it’s tough to figure out, and it can honestly be quite frustrating.”
The low-FODMAP diet was developed by researchers at Monash University in Australia to help with gastrointestinal disorders such as irritable bowel syndrome (IBS). FODMAPs are a group of short-chain carbohydrates and sugar alcohols found in various foods that can be difficult for some people to digest.
“My goal has always been to take the stress out of eating and to help people on a low-FODMAP diet enjoy food again — in all aspects, the eating, the cooking, the flavour.”
Glentis, who has lived with fructose malabsorption and lactose intolerance since she was 19 and has her own low-FODMAP-food business, has always focused on food that tastes good so that no-one will know it is low-FODMAP, gluten-free, dairy-free and allergy friendly.
In her cookbook Always Delicious, Low-FODMAP Kitchen Glentis includes recipes for many classic dishes that are typically laden with onion, garlic and other high-FODMAP ingredients and tweaks them so people can continue to enjoy them using ingredients like garlic-infused olive oil, low-FODMAP stock cubes and tinned rather than dried beans.
As many fruits and vegetables are only low-FODMAP in certain amounts, accurate kitchen scales are a must-have. So her recipes are formulated to be low-FODMAP on a per serve basis.
She includes tables of common ingredients and their safe low-FODMAP serving to assist those on the diet.
The book
Images and text from Always Delicious Low-FODMAP Kitchen by Chrissy Glentis, photography by Armelle Habib. Murdoch Books, RRP $45.
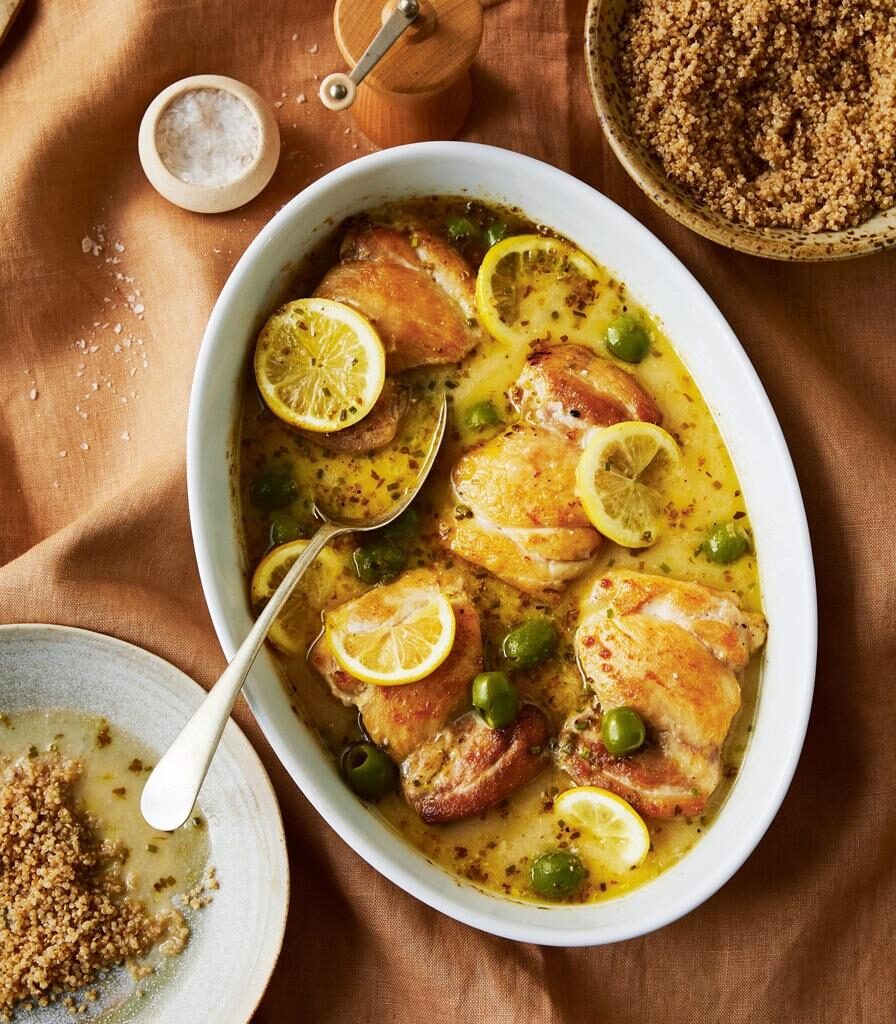
One-pan lemon and olive chicken
This recipe is perfect for busy weeknights when you want a wholesome, flavoursome meal without the fuss.
Juicy, tender chicken thighs are seasoned to perfection and cooked with lemon, which infuses a bright, tangy flavour.
I love to serve it with rice or quinoa, but it can really be served with any pasta or grain you like.
Serves 4
Egg, gluten, soy free
Ingredients
2 Tbsp extra-virgin olive oil
500g skinless, boneless chicken thighs
½ tsp salt
¼ tsp black pepper
1 Tbsp garlic-infused olive oil
1 cup (250ml) water or Low-FODMAP chicken stock
1 low-FODMAP chicken stock cube (omit if using chicken stock)
1 tsp dried chives
1 tsp dried oregano
¼ cup (60ml) milk of your choice
½ lemon, sliced into 5mm thick rounds
1 Tbsp soft brown sugar
¼ cup (45g) whole green olives
¼ tsp ground cumin
1½ Tbsp cornflour (cornstarch) mixed with ¼ cup (60ml) cold water
fresh flat-leaf (Italian) parsley, to garnish (optional)
Method
Preheat the oven to 180˚C. Heat the oil in a deep, ovenproof frying pan (see tip) over medium high heat and brown the chicken with the salt and pepper. Once browned, add all the other ingredients, except the parsley, to the pan and cover with the lid or aluminium foil. Bake for 20 minutes.
Serve with your choice of cooked pasta or grains and top with parsley, if you like.
Enjoy straight away or store in the fridge for up to 3 days, or in portions in the freezer for up to 3 months. For the best results, allow to thaw overnight in the fridge, then heat in the microwave for 2-3 minutes, stirring halfway through, until evenly heated. You can also reheat it from frozen in the microwave for 4-6 minutes.
Tip: If you don’t have an ovenproof frying pan, simply brown the chicken in a regular frying pan, then transfer to an ovenproof dish or roasting tin.
Low-FODMAP chicken stock
Makes 4 cups (1 litre)
Dairy, egg, gluten, lactose, nut, soy free
Ingredients
1kg chicken carcass
200g carrot, quartered
50g fennel
50g fresh flat-leaf (Italian) parsley
3 bay leaves
1 tsp whole black peppercorns
40g spring onion (scallion) tops, green parts only
2 tsp dried or fresh rosemary
1 tsp dried or fresh thyme
1 tsp salt
2 tsp apple-cider vinegar
2 tsp garlic-infused olive oil (optional)
Method
Add all the ingredients to a stockpot and cover with cold water, about 2cm above the ingredients. Bring to the boil over medium-high heat, discarding any foam that forms on the surface, then reduce the heat to low and simmer gently, uncovered, for 3 hours.
If it bubbles too rapidly, it will reduce the liquid too much and the stock will be murky instead of nice and clear, so keep an eye on it and top up the water if needed.
Drain through a sieve or colander into a large bowl or pot to catch all the beautiful stock. Allow the stock to cool slightly before portioning (if not using right away). I find it’s easiest to store this in 1 cup (250ml) quantities.
Store in the fridge for up to 5 days or in portions in the freezer for up to 3 months. If using in soups or hot meals, simply add from frozen or defrost in the microwave for 1-2 minutes (it defrosts rather quickly).
Faux-lafel burger with roasted vegetables and grilled halloumi
This recipe uses the faux-lafels below. Simply grill or roast vegetables of your choice (I like to use eggplant/aubergine and pumpkin/squash) in the oven or on your barbecue, fry some halloumi cheese and your life will never be the same again!
This is also great with kale pesto.
Serves 6
Egg, nut, soy free
Ingredients
1 eggplant (aubergine), cut into 1cm-thick rounds
150g kabocha (Japanese) pumpkin (squash), cut into 1cm-thick slices
⅓-½ cup (80-120ml) extra-virgin olive oil
300g halloumi cheese, cut into 5mm-thick slices
⅓ cup (about 60g) kale pesto (optional)
6 burger buns of your choice
1 cup (35g) rocket (arugula)
6 faux-lafel patties, cooked (see below)
⅓ cup whole-egg mayonnaise
salt and black pepper, to taste
Method
Preheat the oven to 180˚C or the barbecue to high heat. Place the eggplant and pumpkin on baking trays and drizzle half of the oil on top. Season with salt and pepper and roast for 15-20 minutes, or until cooked through.
If you’re using the barbecue, toss the vegetables in the oil, salt and pepper in a large bowl and grill for 3-4 minutes on each side.
Heat the remaining oil in a frying pan over high heat, then reduce the heat to medium-low and add the halloumi slices. Fry for 1-2 minutes on each side or until golden brown. The halloumi will soften as it cooks, so be careful when removing it.
Serve the halloumi as hot as possible, as it will harden as it cools and lose that delicious soft, gooey texture. Spread some kale pesto (if using) on the bottom half of the burger buns, then top with a faux-lafel patty, some roasted pumpkin and eggplant, the freshly grilled halloumi and some rocket. Spread some mayo on the top half of the bun and sandwich together.
Tip: You can make the faux-lafel patties ahead of time and also roast the vegetables the day before for an even quicker meal.
Faux-lafels
Traditional falafels are made with chickpeas or beans and are too high in FODMAPs, so I created this recipe, which is not only low-FODMAP but possibly even better than the original! This is my sister’s favourite dish, and when she heard I was writing a cookbook, her first question was, “will the falafels be in it?”
She loves them because these falafels aren’t dry like traditional chickpea ones can be. By using potato instead of legumes, these falafels are soft and fluffy, yet still have the authentic flavour of the ones we know and love.
I have two different serving options to show just how versatile these are. You can shape them into balls or patties and even fry them in a little oil if you want a crunchier, more authentic exterior. You can also use them in wraps, add them to your favourite salad or even serve as an appetiser with tzatziki.
Serves 4
Dairy, egg, gluten, nut, soy free
Ingredients
700g potatoes, peeled and cut into 2cm (¾ in) dice
50g pepitas (pumpkin seeds)
3 tsp ground cumin
1 tsp ground turmeric
1 tsp sweet paprika
1 Tbsp dried chives
3 Tbsp dried parsley
1 Tbsp garlic-infused olive oil
1 Tbsp extra-virgin olive oil
½ tsp salt
½ tsp black pepper
Method
Put the potato in a stockpot and add enough cold salted water to cover the potato by 2cm. Bring to the boil over high heat, then reduce the heat to medium and boil for 15-20 minutes, or until the potato can be easily pierced with a fork. Drain and allow to cool slightly before mashing.
Blitz the pepitas in a blender until finely crushed, then add to the mashed potato along with all the other ingredients and mix well to combine.
Preheat the oven to 200˚C. While the oven is heating, divide the mixture into six balls and shape into patties (see tips). Place on a baking tray lined with baking paper and bake for 5-10 minutes on each side until golden brown.
The falafels can be frozen for up to 4 months. Just add some baking paper between each one to prevent them from freezing in one lump. Leave to thaw in the fridge overnight, or microwave for 2-3 minutes.
Tips: You can shape these into balls if you prefer a more authentic shape. Shallow-fry the patties instead of cooking in the oven for a crispy, golden finish.
No-bake lemon curd and lemon meringue cheesecake
Indulge in the exquisite blend of tangy and sweet with this cheesecake, featuring a luscious lemon curd.
This delightful dessert marries the creamy richness of a classic cheesecake with the vibrant zing of fresh lemon. It’s topped with a light, fluffy meringue that’s gently toasted to perfection.
It has become one of my most requested desserts to bring to family gatherings, and I have no doubt the same will happen with your families. The recipe does have a few steps to it, but it is 100% worth the extra work.
You will also need a blowtorch for the meringue, as this is a no-bake cheesecake, it cannot go in the oven to cook the meringue, as it will melt the cheesecake filling.
Serves 12
Gluten, nut, soy free
Lemon curd
1½ Tbsp cornflour (cornstarch)
Zest of 1 lemon
Juice of 3 lemons (about 200ml)
3 egg yolks (save the whites for the meringue)
125g caster (superfine) sugar
Base
400g packet gluten-free plain sweet meal biscuits
100g butter, melted, plus extra if needed
Filling
2 tsp gelatin powder
¼ cup (60ml) lemon juice
500g cream cheese, softened
¾ cup (165g) caster (superfine) sugar
Zest of 1 lemon
½ cup (125g) sour cream
1 cup (250ml) thick (double/heavy) cream
Meringue
3 egg whites (reserved from the curd)
¾ cup (165g) caster (superfine) sugar
Extra-virgin olive oil or butter, for greasing
Method
Grease a 24cm springform cake tin with oil or butter. To make the curd, mix the cornflour with the lemon juice and zest in a bowl. In another bowl, whisk the egg yolks and sugar until well combined.
Heat 225ml water over high heat until just starting to boil. The cornflour will settle at the bottom of the bowl, so give the mixture a quick stir before adding it to the boiling water with the lemon. Whisk continuously until thick, about 2-3 minutes. Once the mixture has thickened, remove it from the heat and leave to cool for 1 minute.
Add some of the egg yolk and sugar mixture to the lemon mixture and stir quickly to combine, then add the remaining egg yolk and sugar mixture. Once everything is combined, place the pan back over medium-high heat and stir until thickened, about another 2-3 minutes. Remove from the heat and leave to cool completely.
The curd will keep in an airtight container for 1-2 weeks in the fridge, so you can make this ahead of time.
For the cheesecake base, blitz the biscuits and melted butter together in a food processor until a crumb forms (add a little more melted butter if needed).
Press the crumb mixture into the base of the tin. Use a glass to press and compact the crumb firmly, making sure to even out the edges where the base and side meets, as it can get quite thick. Refrigerate until set.
For the filling, in a small saucepan, sprinkle the gelatin over the lemon juice and let it sit for a couple of minutes. Turn the heat to low and warm, stirring constantly until the gelatin has dissolved. Allow to cool slightly. Add the cream cheese and sugar to a stand mixer fitted with the whisk attachment and beat until smooth and creamy.
You can also do this in a large mixing bowl with an electric mixer. Add the lemon zest, lemon juice mixture and sour cream and beat until combined. Pour in the cream and beat for 2-3 minutes, or until fluffy.
Pour the filling on top of the base and refrigerate for at least 2 hours, or overnight, to set. Once set, spread the lemon curd on top about 1cm-2cm thick. The thicker the layer, the tangier your cheesecake will be.
Make the meringue on the day you wish to serve. Place the egg whites and sugar in a small saucepan set over low heat. Stir continuously until the sugar has dissolved and the whites look a little frothy.
Remove from the heat and allow to cool slightly before whipping to stiff peaks in a stand mixer fitted with the whisk attachment, or by hand with an electric mixer.
Spoon on top of the cheesecake and toast the meringue with a blowtorch until it is nice and golden all over.