Instead of relying on your laptop’s tinny internal mic, you can connect your phone’s microphone to your computer. It also comes in handy if your PC doesn’t have an in-built mic, and you need to make a recording or take a meeting. The setup shouldn’t take more than two minutes. Let’s begin.
Why you should use your phone’s mic instead
The microphone inside your phone is (most likely) better than the one inside your laptop. Laptop mics also tend to sound shrill and pick up ambient noise from the keyboard or cooling fans. Most PCs don’t have built-in microphones at all, but they do have network cards or USB ports at the very least. Instead of buying an expensive external microphone just to take Zoom calls, you can stream your phone’s mic to the PC over a wireless or wired connection.
![]()
Credit: Justin Duino / How-To Geek
AudioRelay is probably the most popular app for this job, but it’s closed source and shows ads. Whenever possible, I try to use a free and open source alternative, so we’ll be using AndroidMic for this demo. However, the setup process is almost identical: install the app on both devices and connect them over the same Wi-Fi connection.
You can install AndroidMic for your PC from the official GitHub repo, where you’ll find prebuilt packages for Windows, macOS, and Linux. The AndroidMic mobile app is available on the F-Droid store (a trusted repository of open source Android apps).
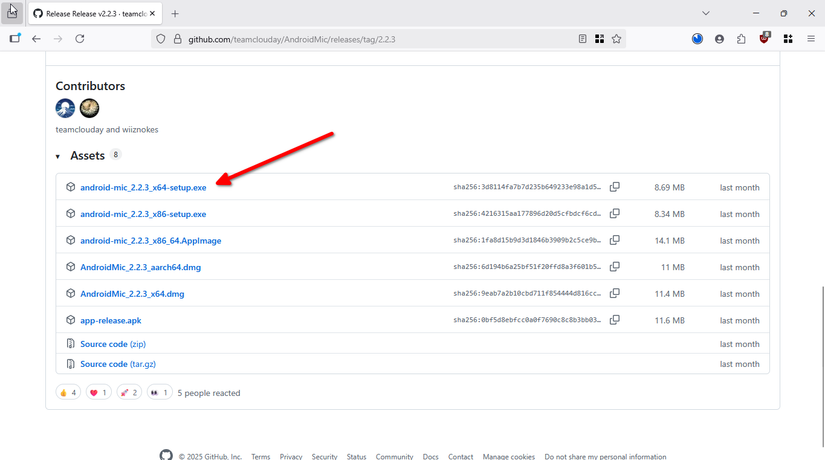
AndroidMic isn’t available on Google Play Store, so you can either install the F-Droid store app to quickly get the app, or you can sideload it using the APK file provided by F-Droid.
How to connect your Android phone’s mic to a PC
Once you’ve installed AndroidMic on both devices, go ahead and open the AndroidMic app on the desktop. You’ll see three sections here: network adapter, audio device, and connection. Make sure you select Wi-Fi from the network adapter menu and Wi-Fi/LAN (TCP) for the connection. Then click ‘Connect.’
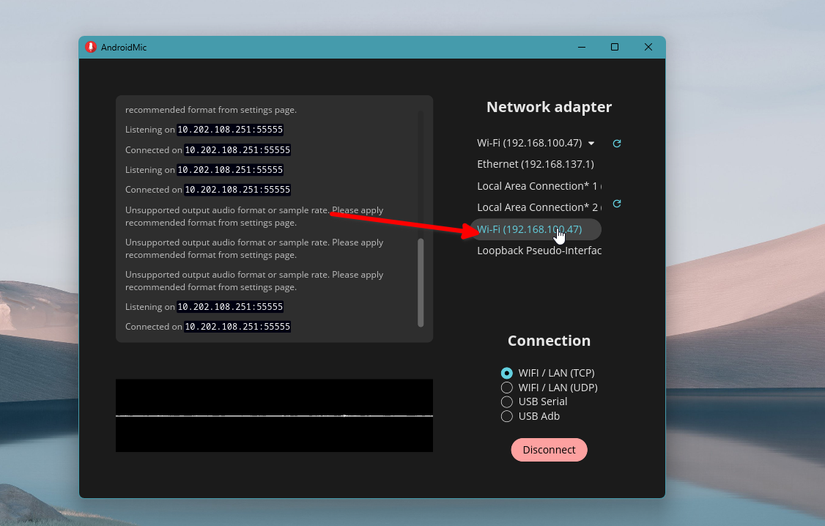
Take a look at the logs, which should now display an IP address and port. We’ll type this IP and port into the mobile app to stream the phone’s mic to the desktop.
Open the mobile app and tap ‘Connect.’ Replace the placeholder IP and port with the address listed in the logs.
If all goes well, the AndroidMic app on the PC should show a ‘connected’ message in the logs. Right away, the microphone should start streaming within the AndroidMic app. You can test this connection by opening the Recorder app or visiting one of those microphone testing websites. You’ll be prompted to choose between an internal and external microphone. The external microphone is your phone’s
Once you’ve tethered the two devices, the phone’s mic will connect to the PC instantly without manual input.
Troubleshooting and bonus tips
When clicking ‘connect’ on the PC for the first time, you might encounter an error like ‘unsupported audio format’ or ‘unsupported sample rate.’ The easiest way to resolve this is to click the ‘Settings’ button on the right pane and select ‘Use Recommended Audio Format.’ Alternatively, you can swipe right within the phone app and make sure the settings listed under Record match the PC audio format configuration.
You might also hear some reverb in the recording, which could be coming from a feedback loop in the computer’s internal mic or the computer’s speaker feeding back into the phone’s mic. You can address the former by disabling the internal mic entirely and the latter by using headphones or lowering the speaker volume.
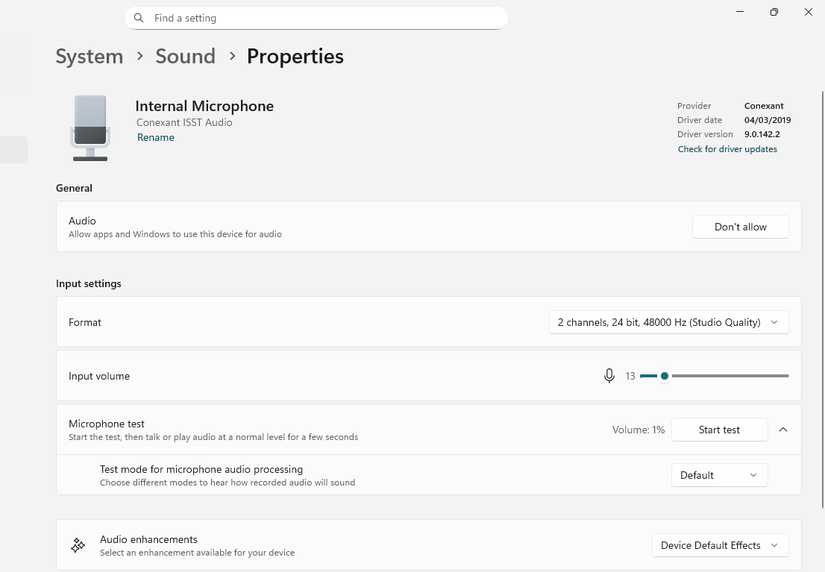
Here’s how you can disable the computer’s internal microphone, if needed. Open the Settings app and navigate to Sound > Properties. Find the Input Volume slider and mute it.
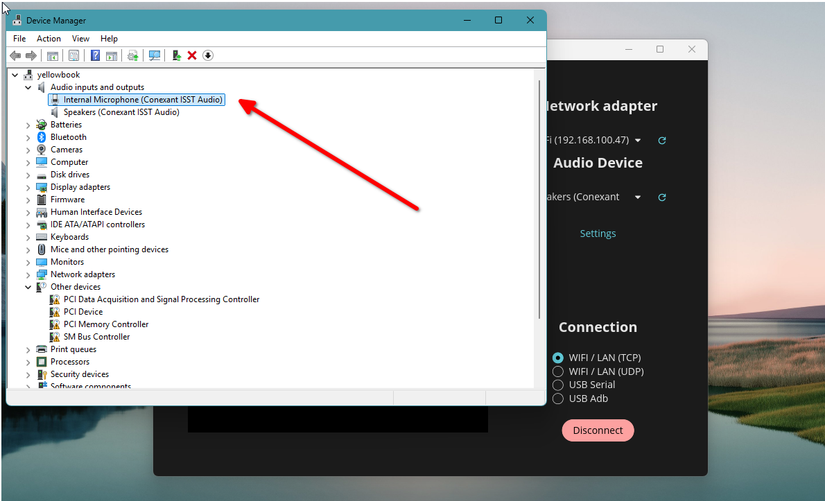
If you still hear echoes or reverb, you can go into device hardware settings and disable the internal microphone entirely. Look up ‘device manager’ in Windows search and open it. Look for a device labeled ‘internal microphone’ or something similar under Audio Inputs and Outputs. Right-click on this device and select ‘Disable Device.’ Confirm the choice when the dialog pops up, and it should immediately turn off your phone’s internal mic.
If you’re still getting reverb, it’s most likely because of the computer’s speakers feeding into the phone’s microphone. In that case, I recommend switching to headphones or just lowering the speaker volume.
Alternatively, you can open AndroidMic settings on the PC app, scroll down to De-reverberation, and enable it. I found it to be hit-or-miss mostly, but it might work for you.
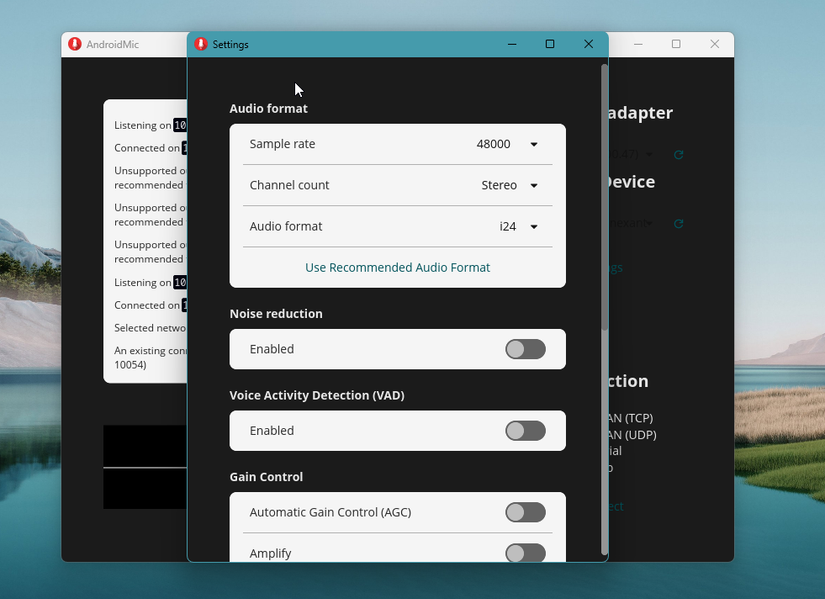
The settings panel also has some other features you might want to enable. For example, you can set AndroidMic to automatically launch on startup and auto-connect when you log into your PC. You can enable Noise Reduction filters or amplify the sound if you’re in a crowded area.
With those simple steps, your phone’s mic is ready to double as your PC’s mic. I’ve tested the app for hours, and the connection is pretty stable, and the voice quality is decent.