Can you believe it? We are entering fall and winter again. Given Arizona’s varied geography, we will soon be moving into chilly or downright cold seasons.
Take this week’s article as a reminder that it’s time, once again, to take a close look at your home’s defenses in combating the coming weather.
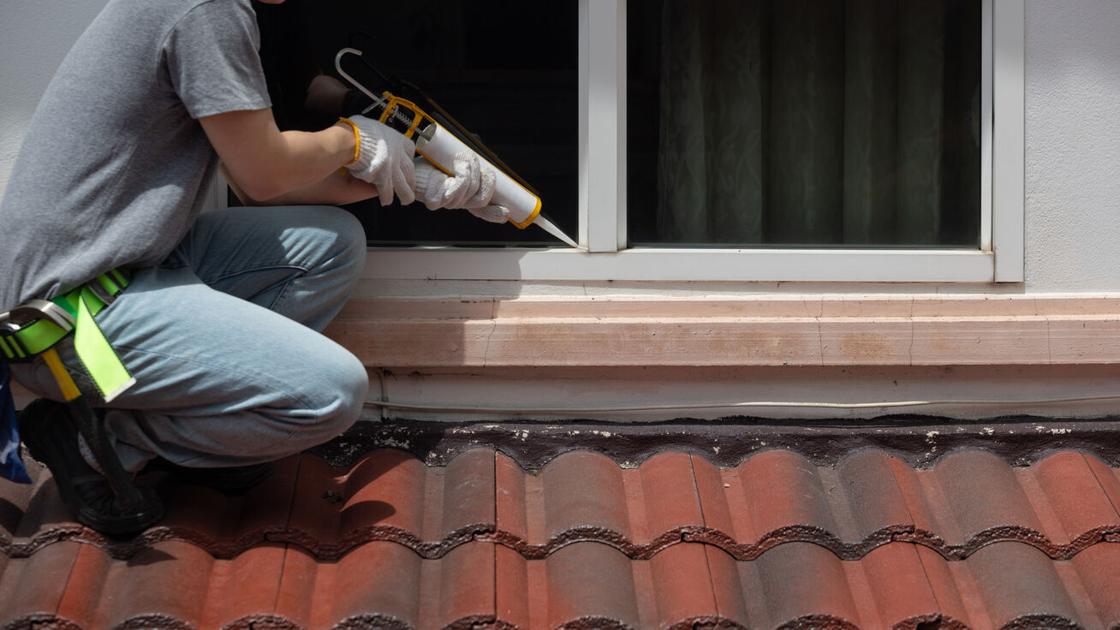
To inspect caulking and weatherstripping, walk around and look at all the nooks and crannies on the outside of your house, including doors and windows. Windows can be inspected from the inside, eliminating the need for ladders.
What you will be looking for differs with caulking and weatherstripping.

Weather stripping comes in several self-adhesive forms.
iStock
To find caulk lines known as beads, find where two different materials come together or similar materials touch each other. Examine the following areas in your home:
People are also reading…
1. Repairs on or around trim work. Door and window trims are likely locations.
2. Stucco home repairs will involve the use of caulking before repainting.
3. Places where stone or masonry features meet other siding materials.
What to look for:
1. Dry caulk. Caulk should have a putty-like feel. Over time, sunlight as well as freeze and thaw cycles can dry out caulking, causing the material to contract and the edges to pull away from the joint the caulking is meant to seal.
2. Discoloration. Some caulks are tinted to match surrounding surfaces. Discoloration typically indicates the caulking’s elasticity or ability to stretch has been compromised.
3. Loose caulk. Check to see if the caulking has come loose from the surfaces it was applied to.
4. Missing caulk. The caulking should be consistent — are there any pieces missing?
5. Water leaks. Are you noticing water marks or stains from the caulk line?
6. Moving air. Run your hand along the caulk to see if you feel any air moving, especially by doors and windows.
There are tools and tutorials readily available that will help you learn to caulk without making a mess. We advise that homeowners practice before tackling a caulk line that is highly visible. If you don’t want to try your hand at caulking, hiring a handyman would be well worth the money, as well-applied caulk and weatherstripping will save money on your energy bill.
Weather stripping comes in several self-adhesive forms.
iStock
Weatherstripping is a strip of material designed to stop air flow or drafts from around the moving parts of doors and windows when they are in a closed position. Attached to the door stops, where the closed door meets the frame or jamb, or the window sash or window frame meets the other when closed.
Several types of materials are used for weatherstripping.
1. Self-adhering strip: This product is installed at the door stop or window frame, where the sash moves, such as in an awning window or casement-type window. The foam strip is positioned on the part of the frame that the door or window closes against. Self-adhering strips are often an affordable option and don’t require special tools or skills. These strips dry out over time and will need to be replaced.
2. V-strip: The V shape of the stripping compresses when the door or moving window shuts, creating a barrier to air flow. When the door or window is opened, it forms a V shape. The material is typically vinyl, although metal stripping is available. Installing either vinyl or metal requires cutting tools and some skill; therefore, it may not be a suitable DIY project for everyone.
3. Compression strip: Constructed of reinforced foam attached to a plastic or metal strip that is connected to the doorstop, or the bottom or top of a window sash. The objective is to compress the reinforced foam when closed, creating the air barrier. As with the V-strip, cutting tools and attachment with either adhesive or small nails will take some skill.
4. Door sweeps: This often-overlooked piece of weatherstripping plays an important role in all our exterior doors. The sweep is installed on the bottom of the door itself. It can be attached to the face of the door at its base or, in some applications, such as sliding doors, on the bottom of the door. The simplest way to replace sweeps is to nail them to the base of the door on the inside. Cutting tools and nails, or screws will be needed.
What to look for:
1. Sweeps are tricky to check. They experience considerable movement with each open and closing motion. Check to see if the sweep is attached securely and not worn out. You will need to use your hands or slide a small mirror under the door when it is open to see any cracks, tears, or missing pieces.
2. Jamb weatherstripping is simpler to check. Verify it is secure and continuous. To check for gaps, close the door and have a light on the outside. Look carefully at that portion of the door that touches the stop and see if any light peeks through.
3. Check the doors and windows in both open and closed positions.
4. Check the windowsill periodically for dust from outside that has collected on the inside.
Ultimate test
To find air leaks with a reliable method, a blower door or static pressure test is recommended by a Rosie Certified Partner. These tests are generally part of a home energy audit. These tests are well worth the money.
When it comes down to inspecting your home for air infiltration or loss, it’s all about saving energy and your dollars.
The top stories from Sunday’s Home+Life section in the Arizona Daily Star.
Join Rosie on the House every Saturday morning 8-11 on KTAR 92.3 FM and KNST 790 AM from 10-11 a.m.
Do you have questions about your house, home, castle or cabin? Reach us by phone at 1-888-767-4348 or email info@rosieonthehouse.com. Follow us on Facebook, YouTube, and Instagram.
Make your house a home
For the holidays: Get inspiring home and gift ideas – sign up now!